


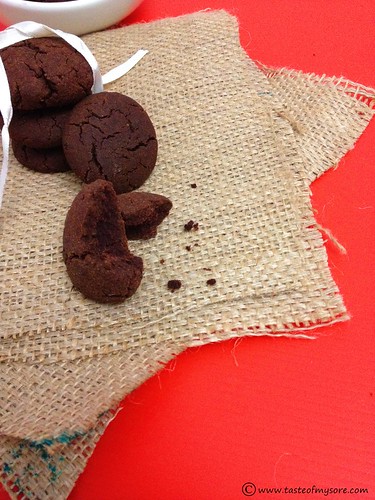


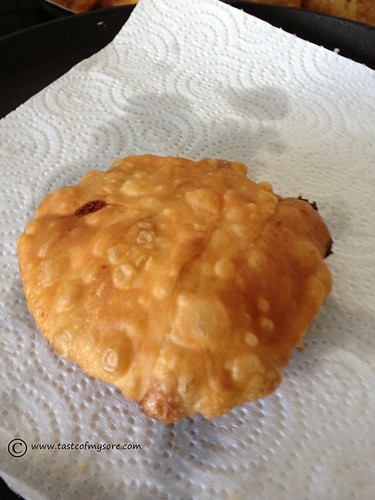
Sapaada Bhakshya~ Satyanarayana Pooje Prasada

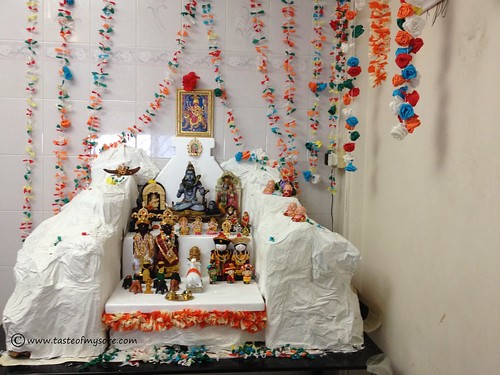
Satyanaraya Pooja at Singapore organised by Kannada Sangha Singapore (Aug 2013)


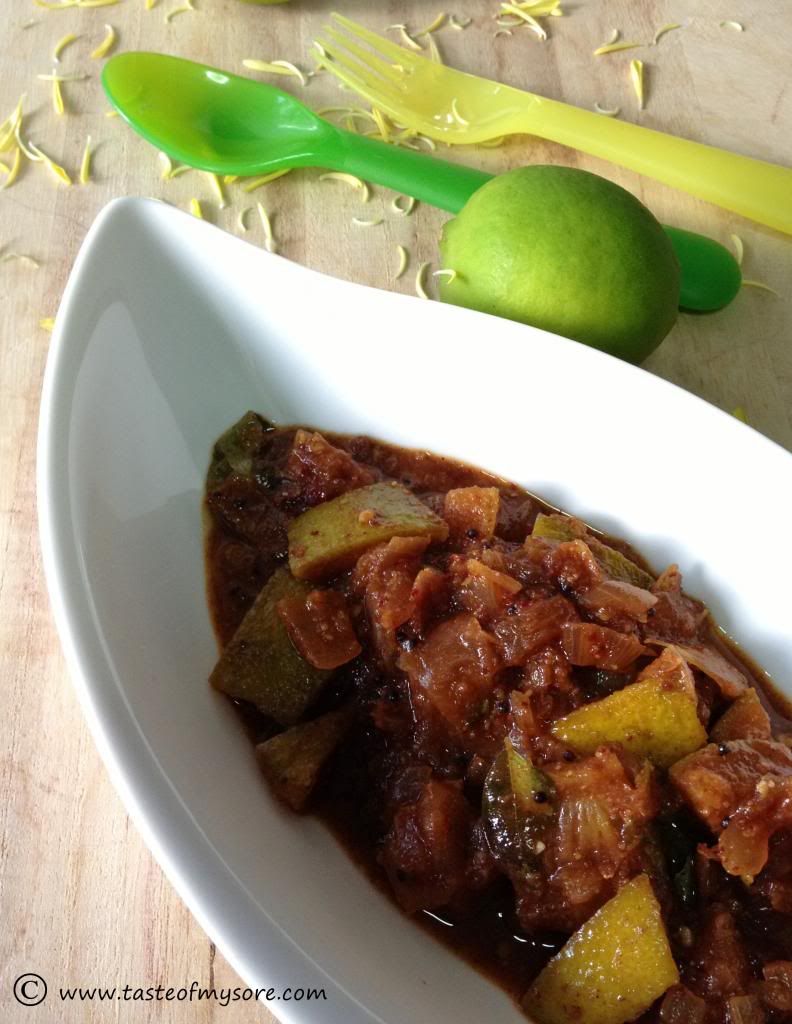
Heralekai Thokku/Pickle
Call it Thokku/Pachadi/Pickle anything, this pickle challenges your taste buds. Try it!

Varamahalakshmi Vrata~ Tie a saree to Kalasha(updated)
Friday, 16 August is Varamahalakshmi Vrata. A simple post to show how to tie a saree to Kalasha.
Step 1:
Assemble boxes which you can find at home like this:
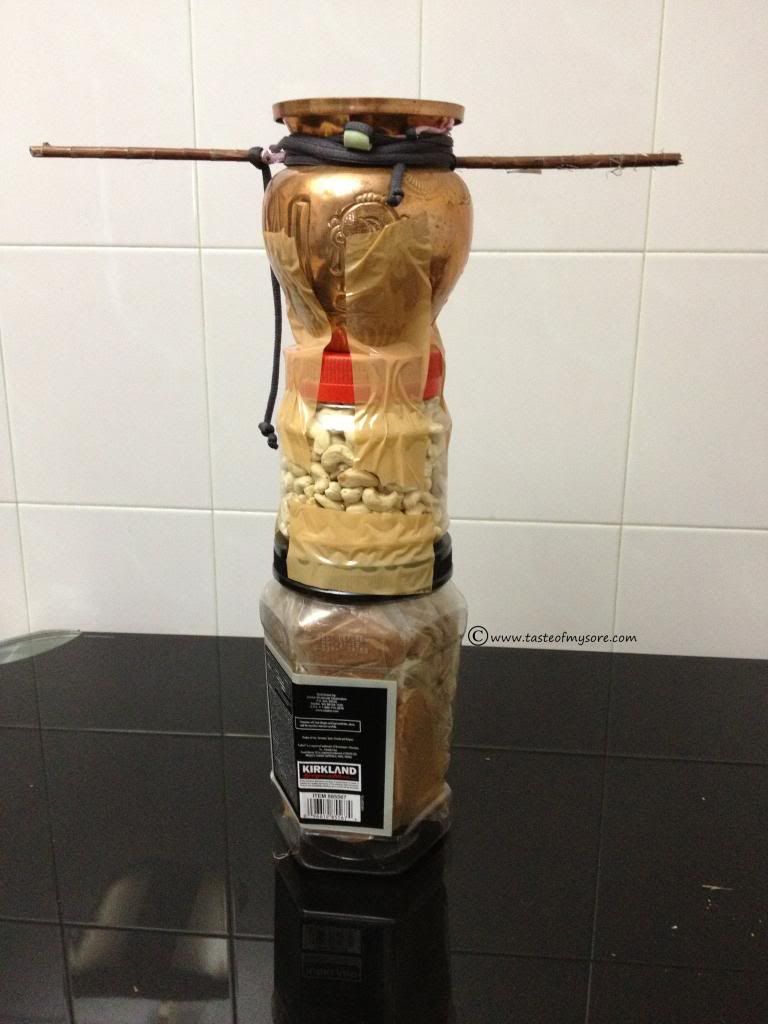
Use a gum tape to glue the boxes together. Keep your kalasha on top and glue tape it to the boxes as shown. Tie a 12" stick as shown in the picture. Make sure that the tape are secured tightly as you do not want to see any mishaps.
Step 2.
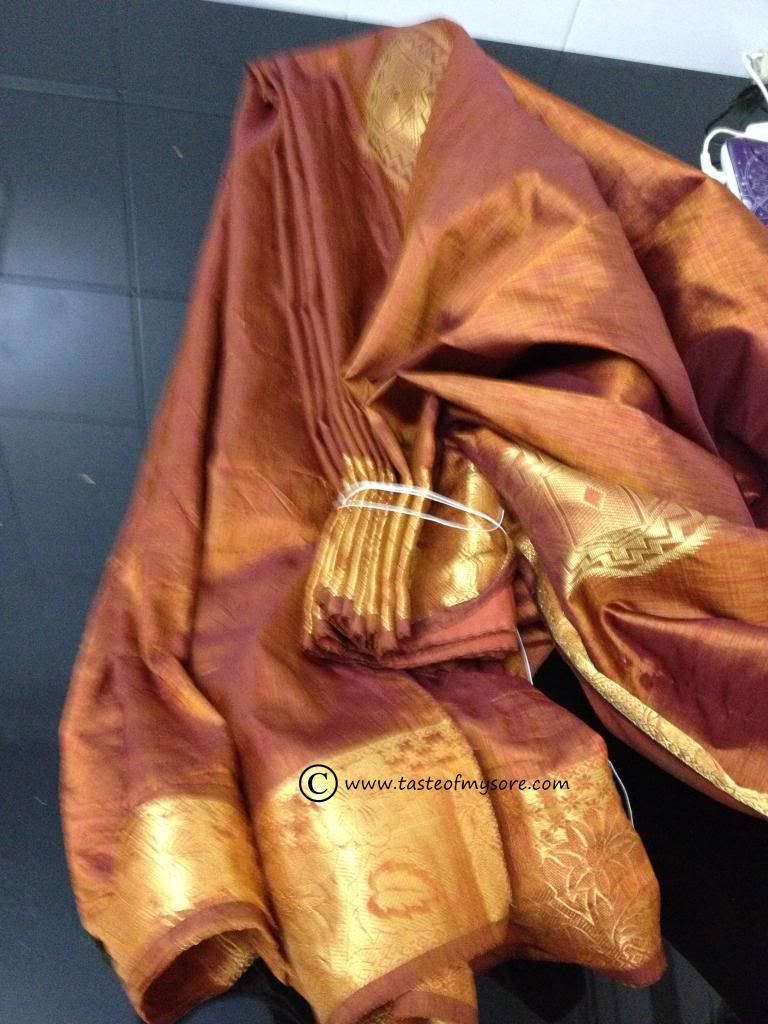
Keep the saree ready. We believe in using a new saree or a saree kept aside for goddess only for such festive occassions. Please check with your elders in the family for saree tye, color etc.
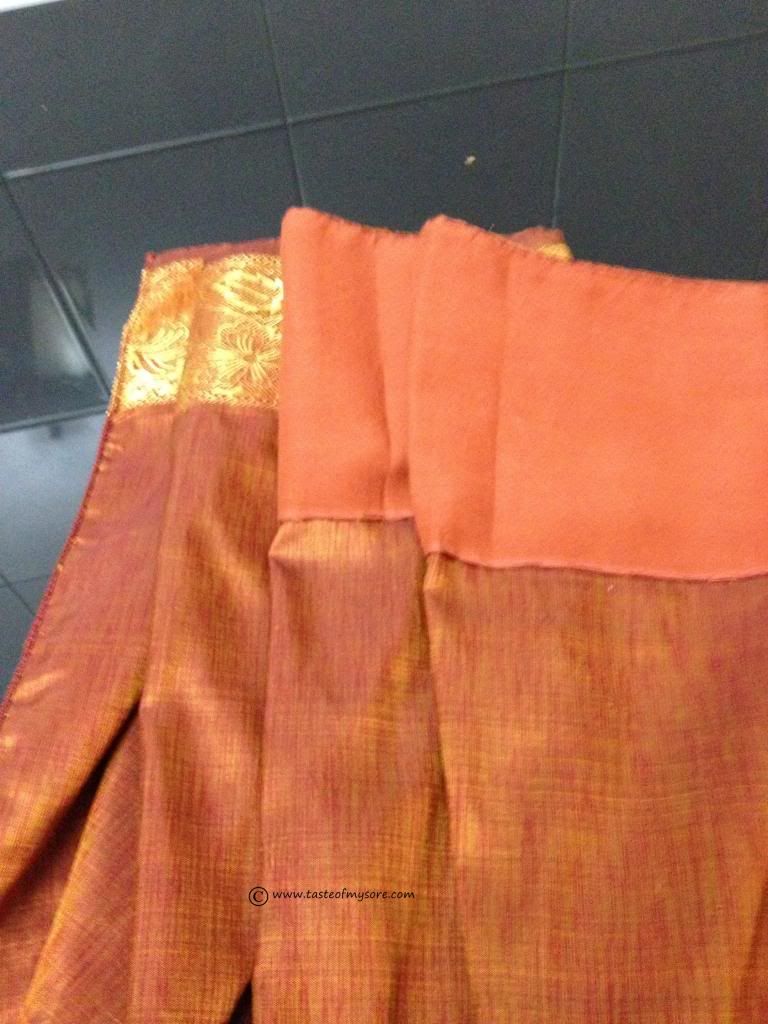
Start from the 'bottom line' of the saree where a flase border is inserted to sarees to protect the borders. Pleat the saree. Take smaller pleats. Hold all the pleates and tie it at the end using a thread. This will help keep all the pleats in one place.
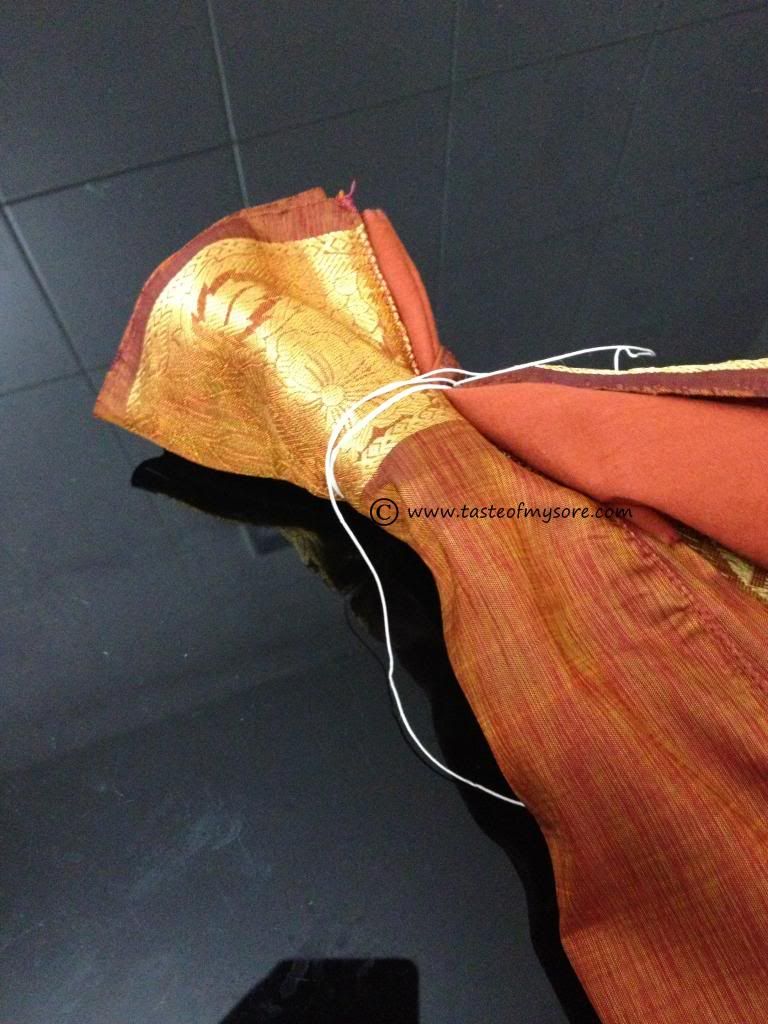
Step 3.
Measure the height of the boxes you have piled up using saree from the folded end.
Once you know the height, fold the saree and pass a thread..like this:

Release the thread you tied to the pleats. Spread the pleats and tie it to the box.
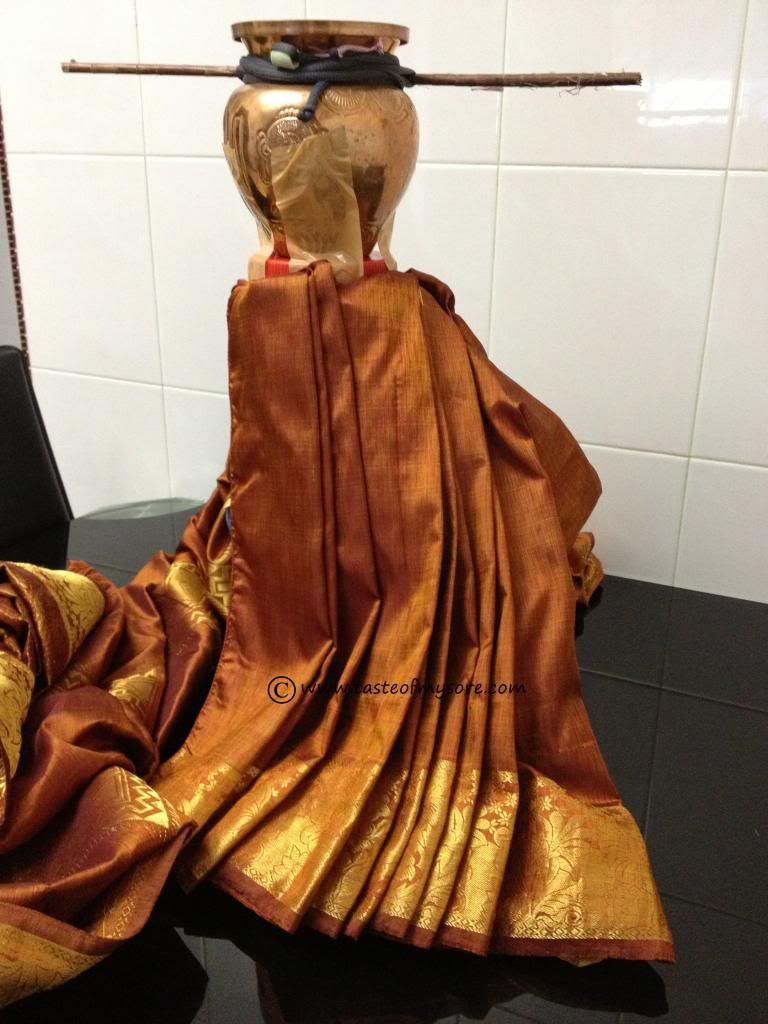
Once you have secured the thread, fold the back portion of the saree nicely and hide it behind the box. Pick the 'pallu' part and pleate them.
Pleat the pallu part and bring it to the front and over the stick, like this..
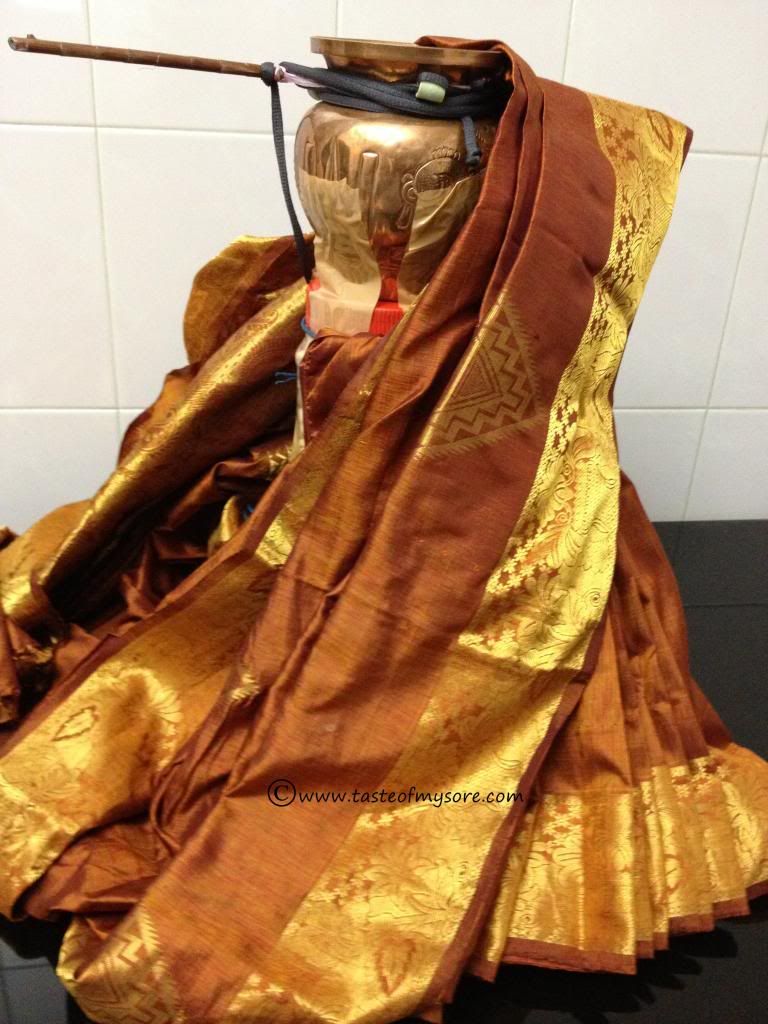

Bring the pleats together and tie a thread in the center to hold everything together, like this :
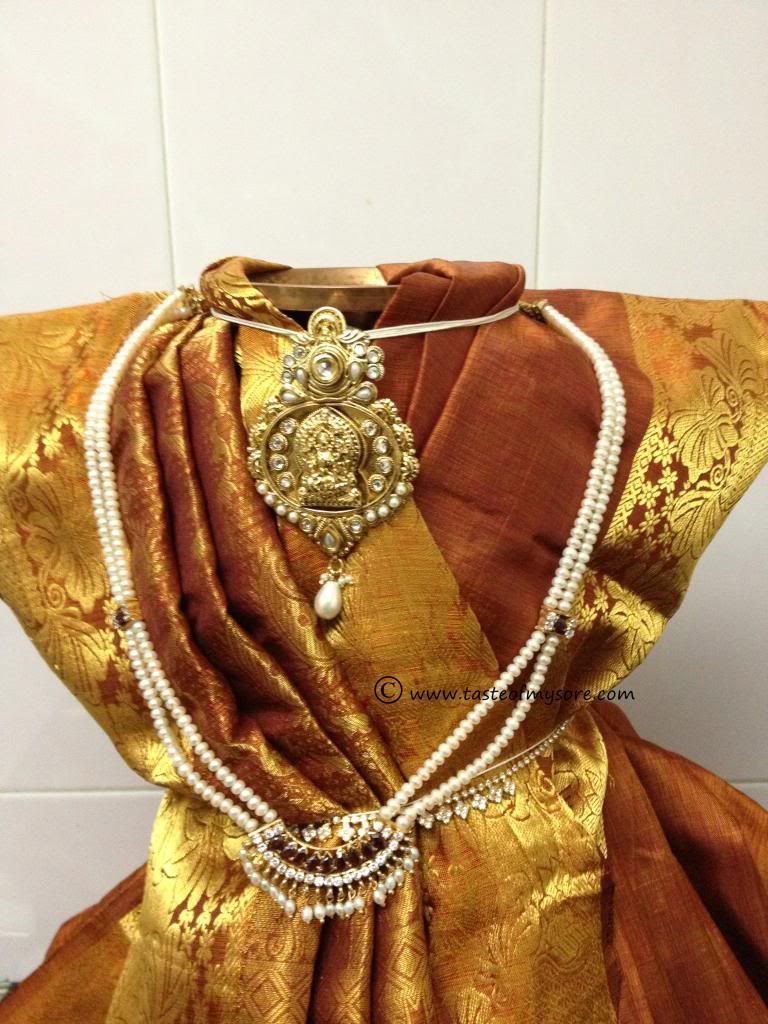
Neaten up the saree. Now, the kalasha is ready to have it's head, which is another task in itself :)
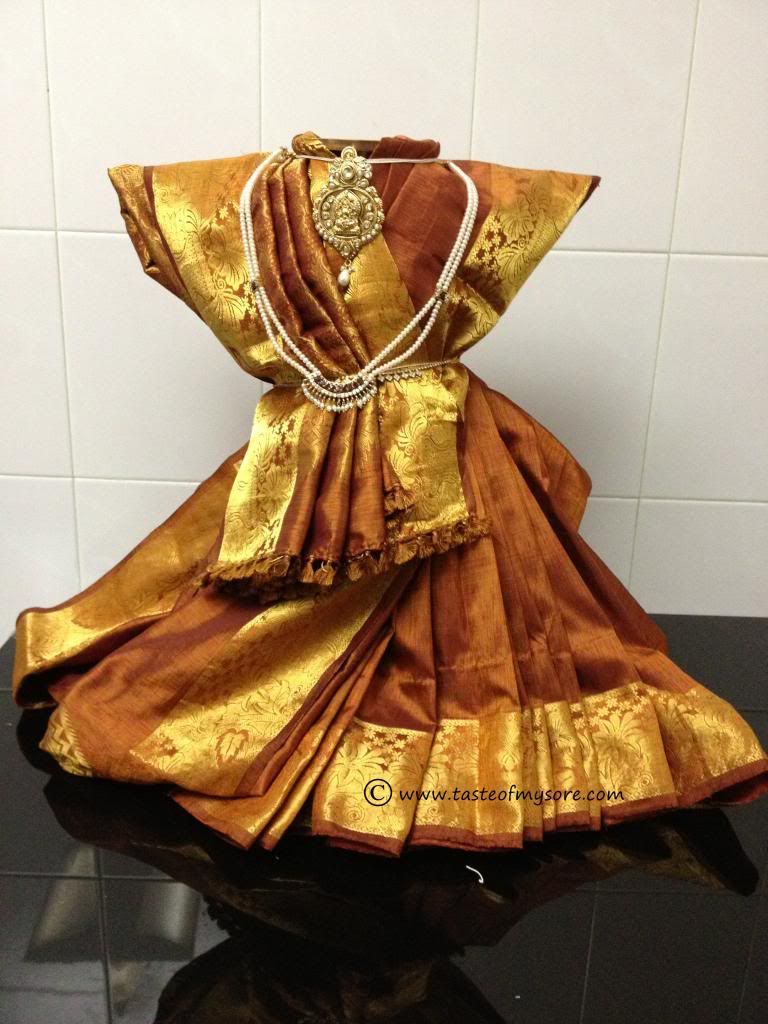
A closer look..
Use your own jewellary or make some using your creativity.
If you are thinking how to draw goddess Lakshmi. Take a look at this website :
Gnaana.com/How to draw Goddess Lakshmi
Lakshmi Mukhavada Alankara at Shringar Costumes, Bengaluru

If you know any other tips to make hands, legs etc, do share it. Thanks everyone for visiting Taste of Mysore. Happy Festival everyone.
Step 1:
Assemble boxes which you can find at home like this:

Use a gum tape to glue the boxes together. Keep your kalasha on top and glue tape it to the boxes as shown. Tie a 12" stick as shown in the picture. Make sure that the tape are secured tightly as you do not want to see any mishaps.
Step 2.
Keep the saree ready. We believe in using a new saree or a saree kept aside for goddess only for such festive occassions. Please check with your elders in the family for saree tye, color etc.

Start from the 'bottom line' of the saree where a flase border is inserted to sarees to protect the borders. Pleat the saree. Take smaller pleats. Hold all the pleates and tie it at the end using a thread. This will help keep all the pleats in one place.

Step 3.
Measure the height of the boxes you have piled up using saree from the folded end.
Once you know the height, fold the saree and pass a thread..like this:


Release the thread you tied to the pleats. Spread the pleats and tie it to the box.

Once you have secured the thread, fold the back portion of the saree nicely and hide it behind the box. Pick the 'pallu' part and pleate them.

Pleat the pallu part and bring it to the front and over the stick, like this..

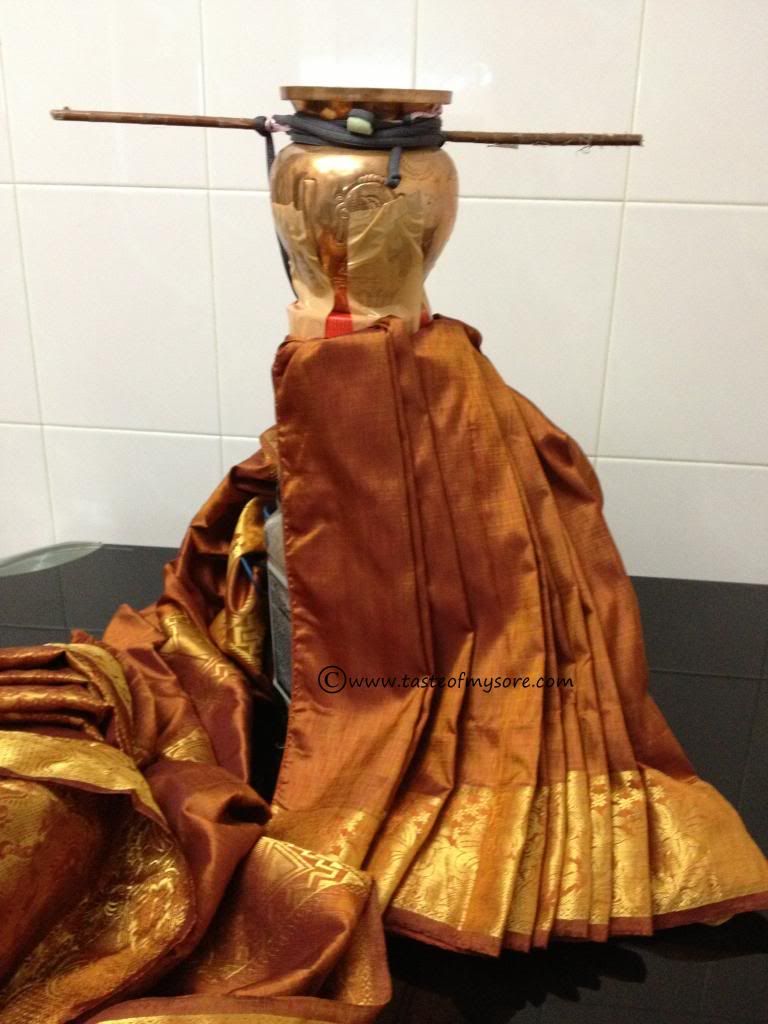
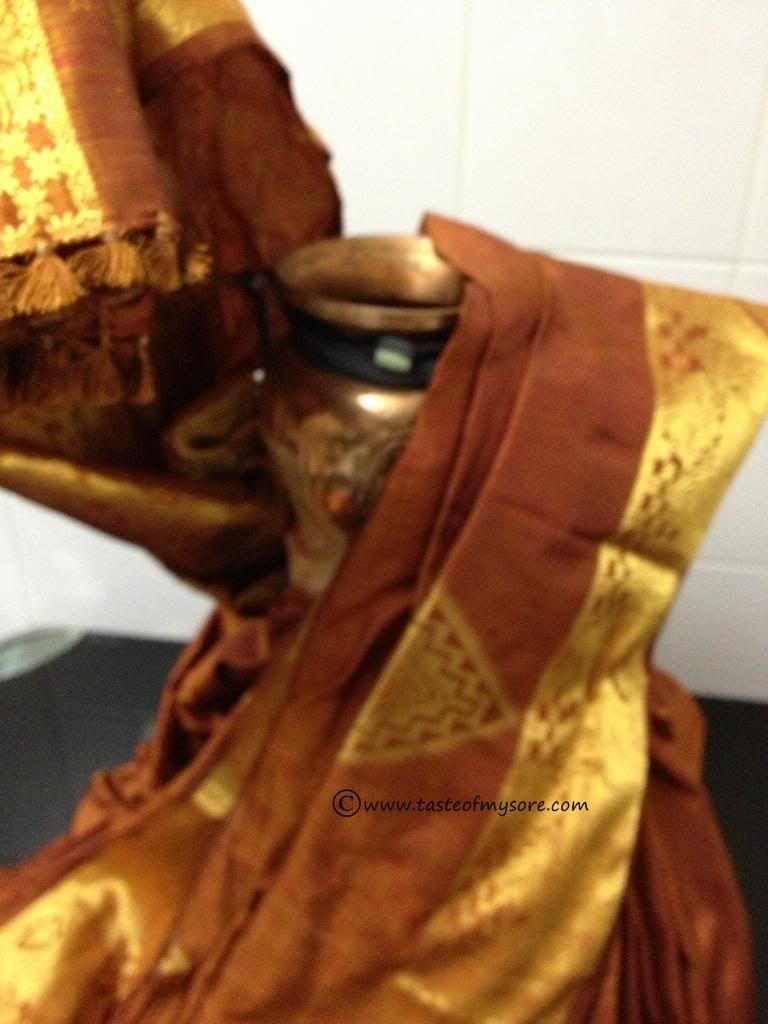
Step 4:
Take the pallu in such a way that it covers Kalasha and stick on both sides. Bring the rest of the pallu from back to front over the stick :

Leave the rest of the pallu in the front as shown in the picture below. Again, cover the kalsha and stick with the saree. Adjust saree accordingly. Rest of the length of the saree should be nicely folded and hid behind the box.

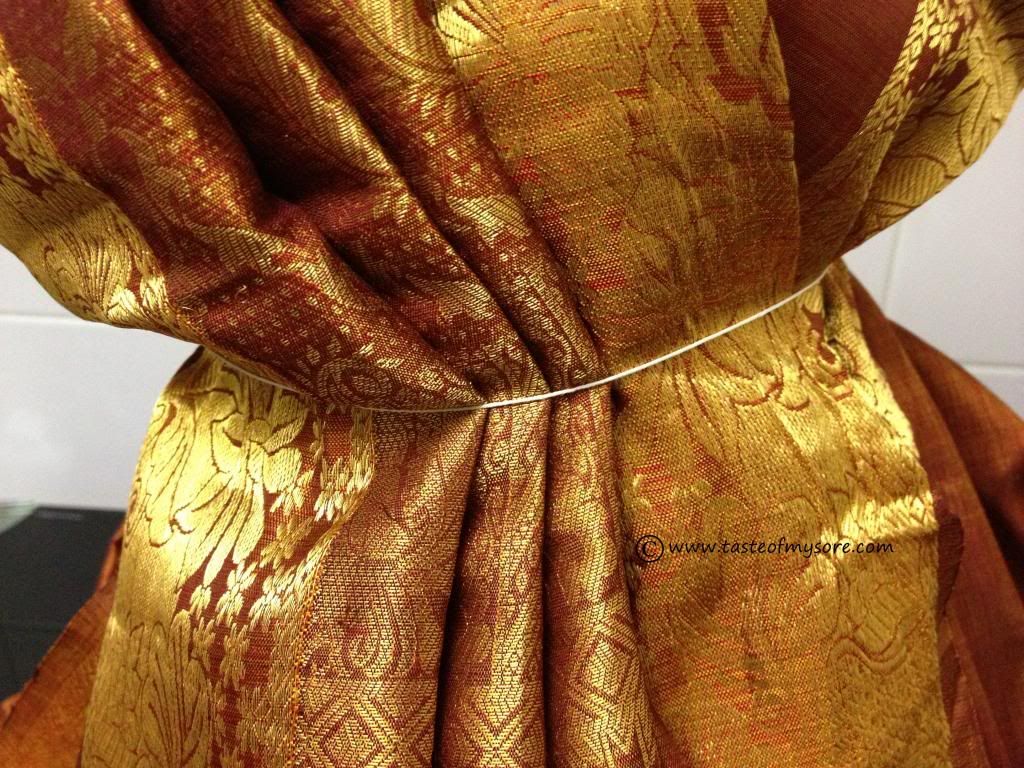
Bring the pleats together and tie a thread in the center to hold everything together, like this :

Neaten up the saree. Now, the kalasha is ready to have it's head, which is another task in itself :)

A closer look..
Use your own jewellary or make some using your creativity.

If you are thinking how to draw goddess Lakshmi. Take a look at this website :
Gnaana.com/How to draw Goddess Lakshmi
Lakshmi Mukhavada Alankara at Shringar Costumes, Bengaluru

If you know any other tips to make hands, legs etc, do share it. Thanks everyone for visiting Taste of Mysore. Happy Festival everyone.
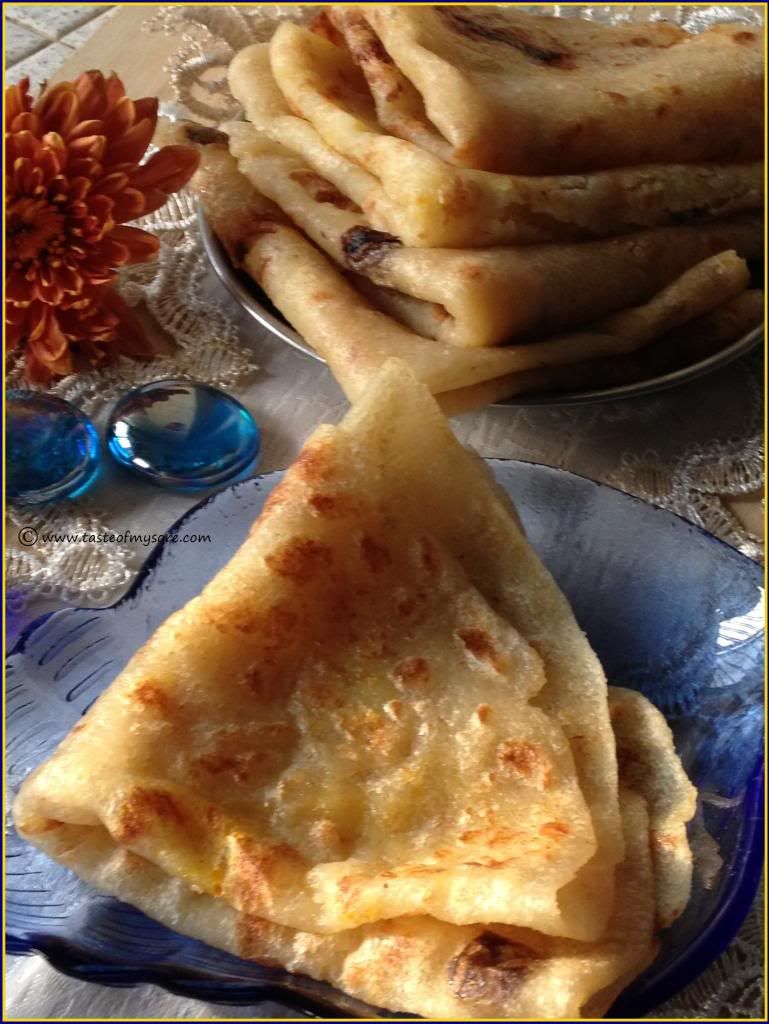
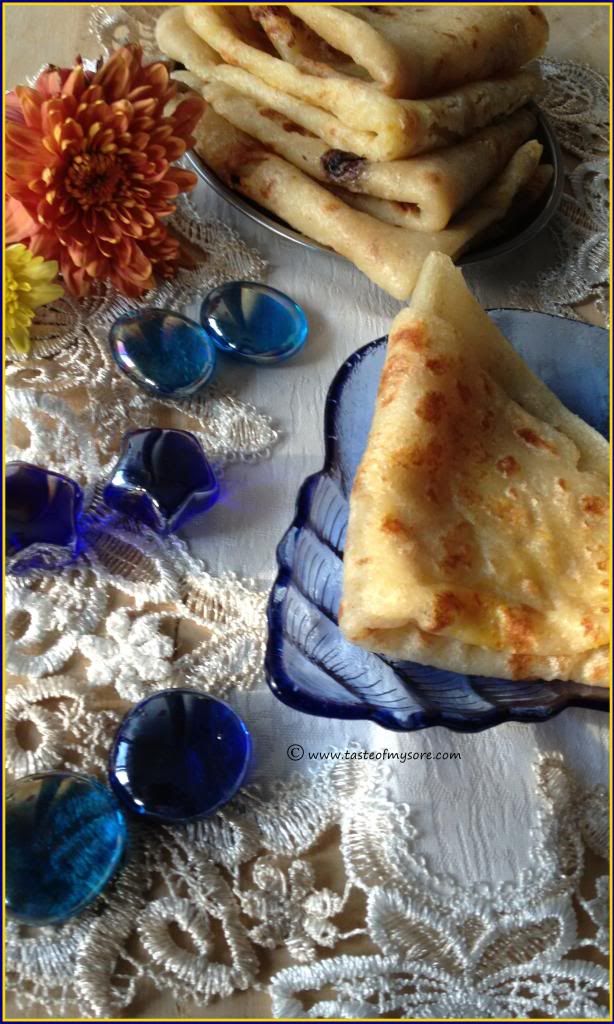
Sajjige Holige ~ Transform Sheera/Kesaribhath into Puran Poli
Shravana Maasa is synonymous to festivals and sweets...
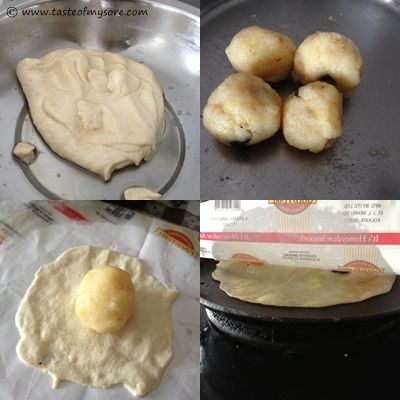
4. Take a non-stick paper. Add a tsp of oil and spread it evenly with your fingers. Pinch the maida(all purpose flour) dough and spread it thin on the paper.
5. Place sajjige in the center. Pull the dough from all sides to the cener and lock the sajjige inside.
6. Press it down and with a well-oiled rolling pin, roll it.
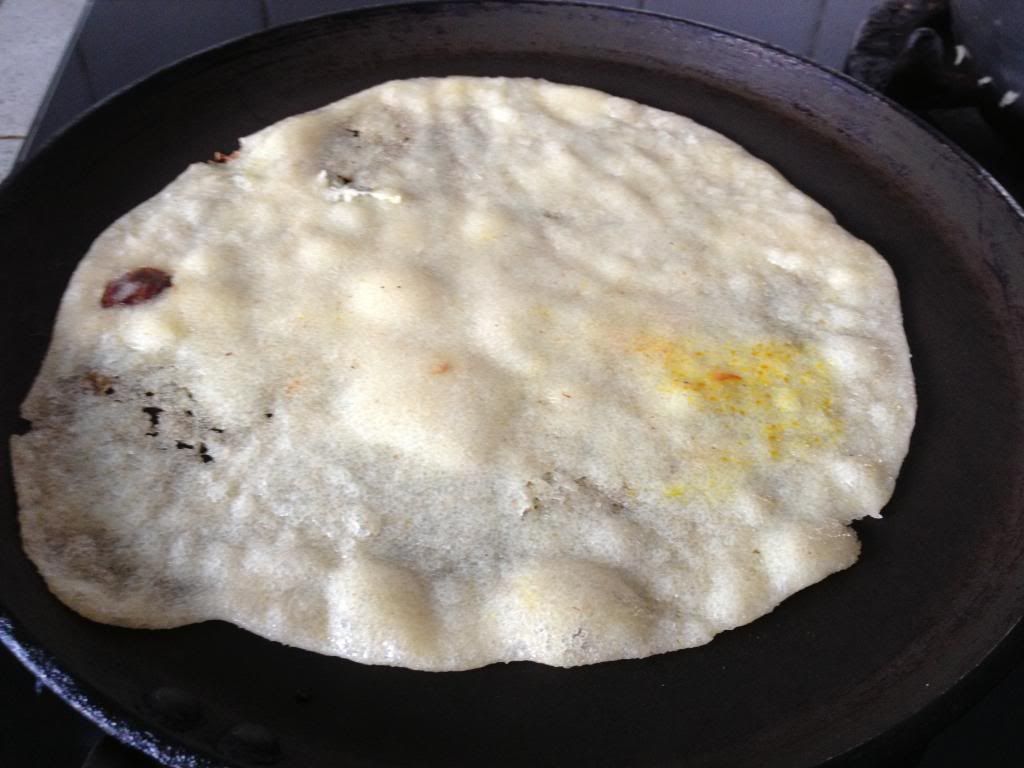
7. Transfer holige over to the pan and spread a tsp of oil on top of it. Fry well on both sides.
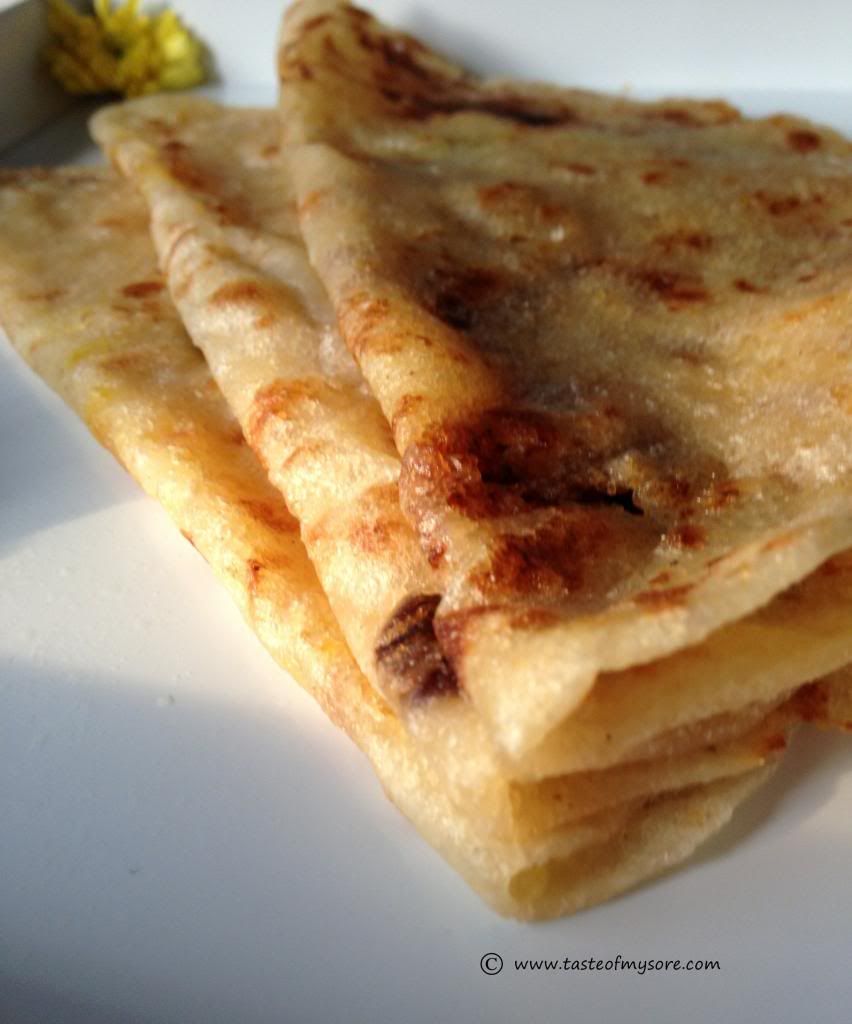
8. Pile them up like this....
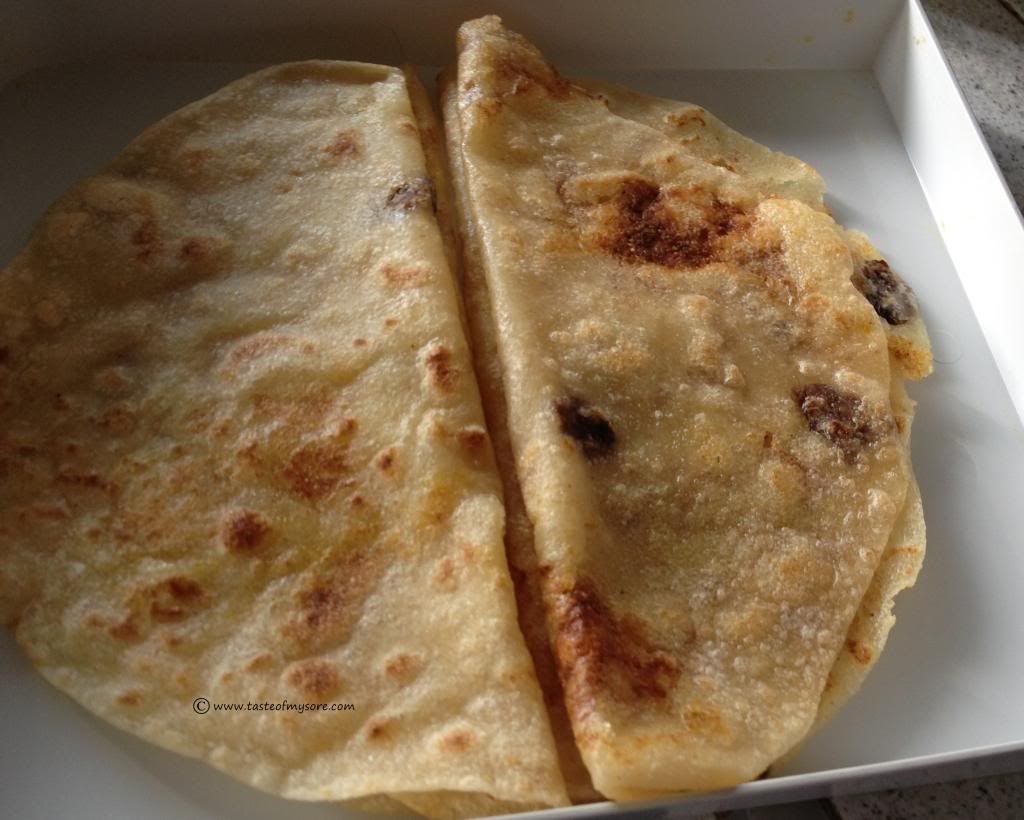
9. The aroma of this holige is irrestible. It's unique fragrance draws anyone to your kitchen.


It is festival time and it's time to blog few creative twists to traditional recipes. Here is one among them. Thanks to amma and ajji for teaching this.
Ingredients:
Sajjige - 1 bowl (left over or you can prepare fresh)
*Sajjige is also called Kesaribhath in Karnataka. Other names for the same dish are Kesari, Sheera, etc., Sajjige = Kesaribath-Color
All Purpose Flour (Maida) + Chiroti Rava- 1 tbsp + 1 cup
Salt- A pinch
Water
Oil
Method: 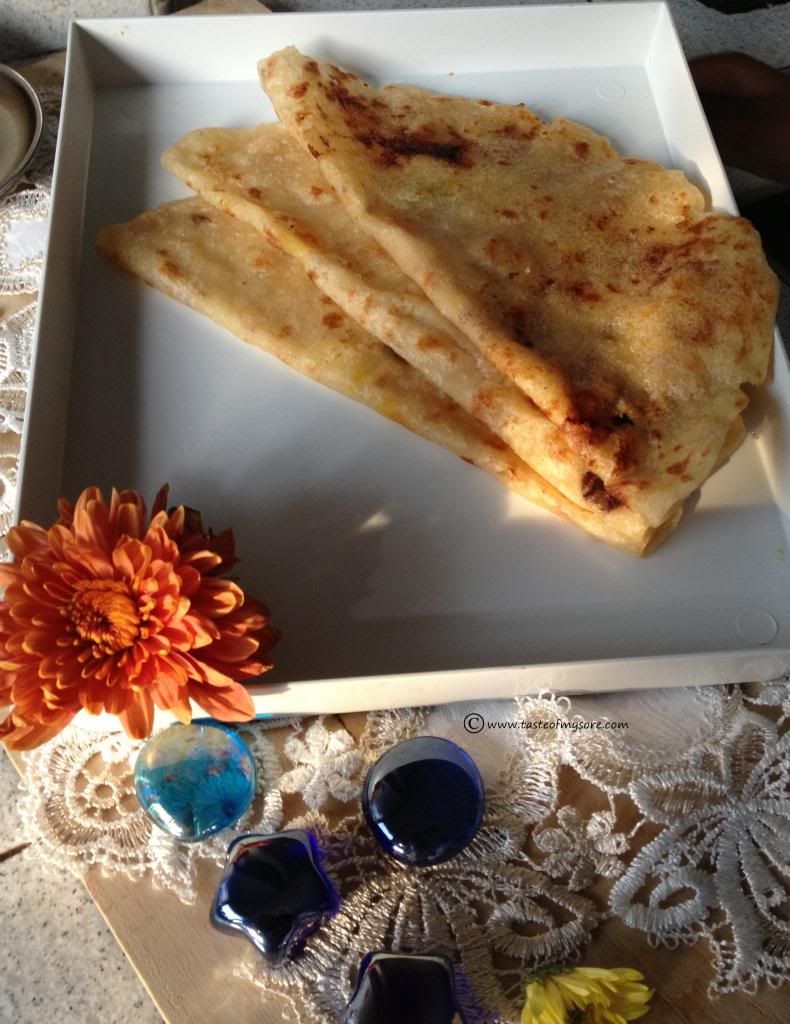

1. Mix maida with chiroti rava and a pinch of salt and mix to make a loose yet firm dough. Pour a 50ml oil on the maida flour and let it stand for 30 minutes.
2. Make lemon sized balls with sajjige.
3. Below is the collage of pictures :

5. Place sajjige in the center. Pull the dough from all sides to the cener and lock the sajjige inside.

6. Press it down and with a well-oiled rolling pin, roll it.
7. Transfer holige over to the pan and spread a tsp of oil on top of it. Fry well on both sides.

8. Pile them up like this....

9. The aroma of this holige is irrestible. It's unique fragrance draws anyone to your kitchen.

10. Do not forget to serve it with a little ghee and tons of love :) Oh Yeah!! Pick one here before you leave....

Broccoli Pulav

Broccoli Pulav is a tried and tested recipe. A recipe which is inspired from Green Pulav at Monsoon Spice blog of Sia. A simple and yet flavorful recipe.
Ingredients :
Broccoli : from 1 small broccoli head. (Florets and stem included)
Basmati Rice : 200g
Olive Oil : 4tbsp
Cashewnuts: 5-8 pieces
Tejpatta - 1
Cinnamon, clove, star anise, - 1 each for seasoning
Garam Masala- 1tsp
Ghee-1tsp
To grind to smooth paste:
Coriander leaves - 1small bunch
Mint Leaves - 10~15 (if available)
Green Chillies- 4~5
Ginger-1" piece
Garlic- 1 clove
Cinnamon, Clove - 1 each

Method:
1. Cook Basmati rice, grains apart. Keep it aside. Soak rice for 10 mins before you cook it.
2. Separate broccoli florets. Cut the stem into small pieces.
3. Boil water with little salt and add separated broccoli florets and stem.
4. Let Broccoli sit in boiling water for 1 min. Switch off the stove. Leave Broccoli sit in hot water for another minute. Separate Broccoli from water. Keep it aside.
5. Grind the ingredients under'to grind' list into a smooth paste.
6. Heat Olive oil, add whole spices (cinnamon,clove and tejpatta). When you see cloves plump, add in ground paste and fry till the raw smell goes off. Add in salt, broccoli florets and mix well.
7.Nex goes cooked rice. Mix well. Switch off the stove.
8. Fry cashew nuts in ghee till they turn golden brown. Pour this over the rice and sprinkle garam masala. Mix well and serve with your favortie raita or yogurt.
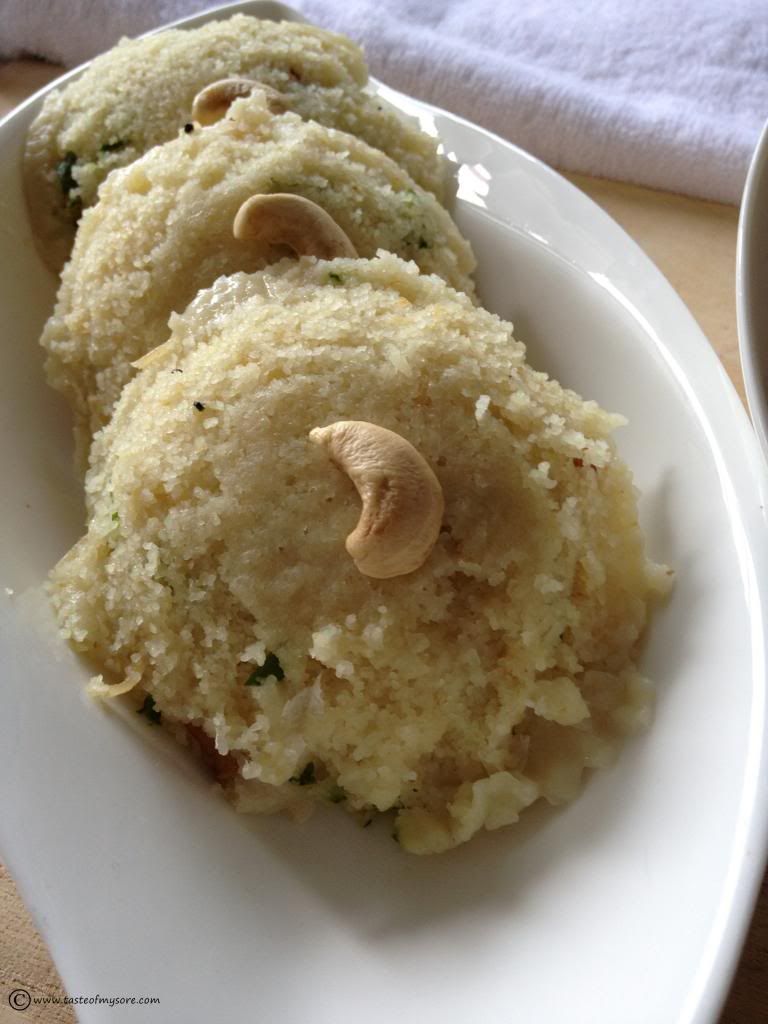
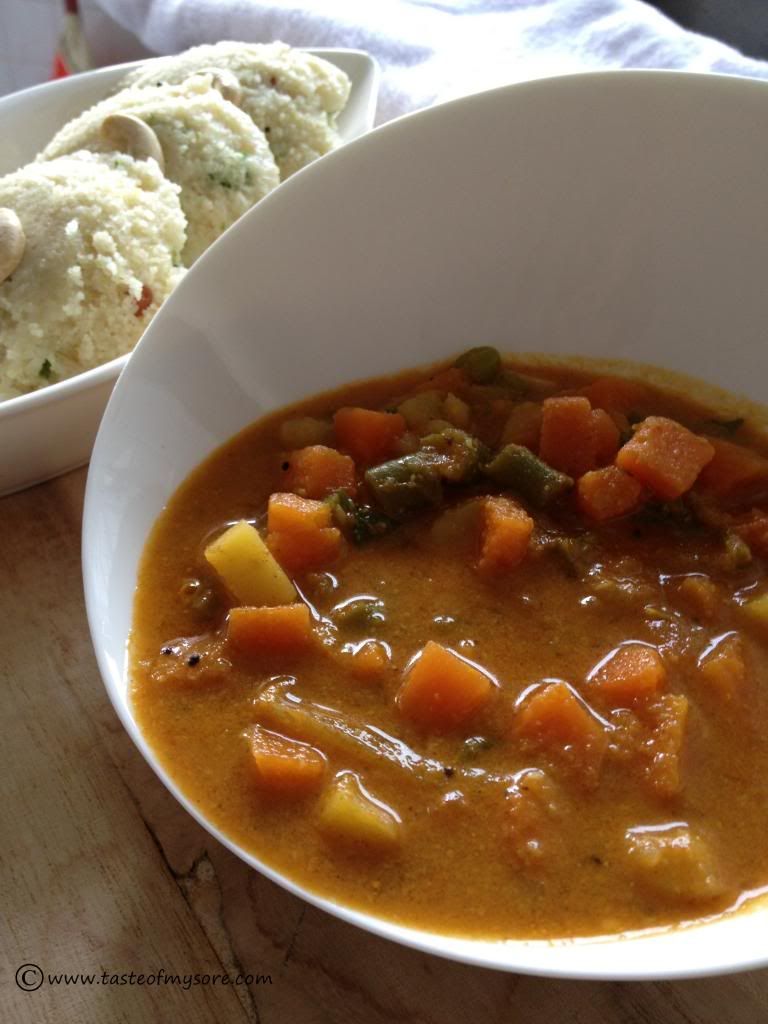
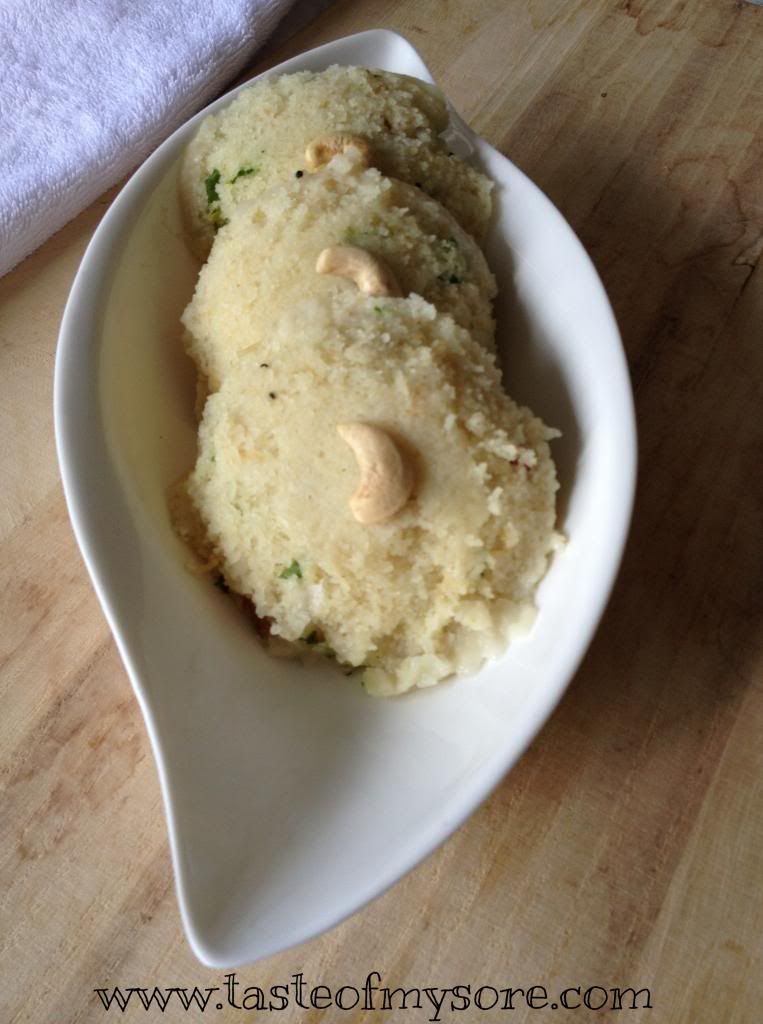
Rava Idli ~ Instant
We all love Rava Idli and Saagu. How about you? Our new favorite is mix veg saagu for Rava Idli :D
Last time when I posted saagu for Rava Idli, one of my reader asked me to post the recipe of Rava Idli. Here you go!
P.S : Photo of rava idli not at it's best :P
Last time when I posted saagu for Rava Idli, one of my reader asked me to post the recipe of Rava Idli. Here you go!
P.S : Photo of rava idli not at it's best :P

Ingredients for rava idli mix:
Chiroti Rava (fine rava) OR Upma Rava - 200g
Cashew nuts - 20
Chanadal - 1tbsp
Mustard - 1/2 tsp
Bambino Vermicilli - 2 tbsp
Curry Leaves - few (chopped finely)
Coriander Leaves - 4 tbsp (chopped finely)
Grated Coconut- 2 tbsp
Ginger grated - 1 tsp
Salt
Oil
Method: Heat oil in a non-stick pan. Add mustard and let it pop. When mustard stops poping, add chanadal. When chanadal starts to turn red add cashew nuts and wait till it turns red. Add curry leaves, coriander leaves and switch off the stove. Add in Rava (semolina, as we call in English), vermicilli, grated ginger, salt and mix well. When the mix cools down, add in grated coconut and mix.
Slurrrp...Vegetable saagu :)

How to make Rava Idli?
Rava Idli Mix - 100g (from above recipe)
Very sour curds - 200ml (I usually let the yogurt to sit outside the refrigerator for 2 days)
Mix the both very well and let it sit for 5 mins.
Aside, you need :
Sodium Bi Carbonate or simply cooking soda - 2tsp
Between this 5 mins, you can do this:
Oil the idli moulds.
Pour water in your idli cooker and bring it to boil.
To the mixture of rava and sour yogurt add in sodium- bi- carbonate and mix well. Scoop the batter to idli moulds and steam them in Idli cooker for 10 minutes or till they are done.
Enjoy your Rava Idli with your favorite accompaniment :D

Subscribe to:
Posts (Atom)